Background
Motion Blur is a very popular technique in fast pace 3D games whose purpose is to add a blurring effect to moving objects. This enhances the sense of realism experienced by the player. Motion Blur can be accomplished in various ways. There is a camera based Motion Blur which focuses on camera movement and there is an object based Motion Blur. In this tutorial we will study one of the options to accomplish the later.
The principle behind Motion Blur is that we can calculate the vector of movement (a.k.a Motion Vector) for each rendered pixel between two frames. By sampling along that vector from the current color buffer and averaging the result we get pixels that represent the movement of the underlying objects. This is really all there is to it. Let's take it to the next level of details. The following is a summary of the required steps and after that we will review the actual code.
- The technique is split into two passes - a render pass and then a motion blur pass.
- In the render pass we render into two buffers - the regular color buffer and a motion vector buffer. The color buffer contains the original image as if it was rendered without motion blur. The motion vector blur contains a vector for each pixel which represents its movement along the screen between the previous frame and the current.
- The motion vector is calculated by supplying the WVP matrix of the previous frame to the VS. We transform the local space position of each vertex using the current WVP and the previous one to clip space and pass both results to the FS. We get the interpolated clip space positions in the FS and transform them to NDC by dividing them by their respective W coordinate. This completes their projection to the screen so now we can substract the previous position from the current and get a motion vector. The motion vector is written out to a texture.
- The motion blur pass is implemented by rendering a full screen quad. We sample the motion vector for each pixel in the FS and then we sample from the color buffer along that vector (starting from the current pixel).
- We sum up the results of each sample operation while giving the highest weight to the current pixel and the lowest weight to the one which is the most distant on the motion vector (this is what we do in this tutorial, but there are many other options here).
- This averaging of sample results along the motion vector creates the sense of bluriness. Obviously, pixels that didn't move between two frames will look the same, which is fine.
This tutorial is based on the Skeletal Animation tutorial (#38). We will review here the changes that add the motion blur to that tutorial.
Source walkthru
(tutorial41.cpp:157)
          virtual void RenderSceneCB()

          {

                CalcFPS();


                 m_pGameCamera->OnRender();


                 RenderPass();


                 MotionBlurPass();


                 RenderFPS();


                 glutSwapBuffers();

          }
This is the main render function and it is very simple. We have a render pass for all the objects in the scene and then a post processing pass for the motion blur.
(tutorial41.cpp:172)
      void RenderPass()

      {

                 m_intermediateBuffer.BindForWriting();


                 glClear(GL_COLOR_BUFFER_BIT | GL_DEPTH_BUFFER_BIT);


                 m_pSkinningTech->Enable();


                 vector Transforms;


                 float RunningTime = (float)((double)GetCurrentTimeMillis() - (double)m_startTime) / 1000.0f;


                 m_mesh.BoneTransform(RunningTime, Transforms);


                 for (uint i = 0 ; i < Transforms.size() ; i++) {

                         m_pSkinningTech->SetBoneTransform(i, Transforms[i]);

                          m_pSkinningTech->SetPrevBoneTransform(i, m_prevTransforms[i]);

                  }


                  m_pSkinningTech->SetEyeWorldPos(m_pGameCamera->GetPos());


                  m_pipeline.SetCamera(m_pGameCamera->GetPos(), m_pGameCamera->GetTarget(), m_pGameCamera->GetUp());

          m_pipeline.SetPerspectiveProj(m_persProjInfo);

                  m_pipeline.Scale(0.1f, 0.1f, 0.1f);


                  Vector3f Pos(m_position);

                  m_pipeline.WorldPos(Pos);

                  m_pipeline.Rotate(270.0f, 180.0f, 0.0f);

                  m_pSkinningTech->SetWVP(m_pipeline.GetWVPTrans());

                  m_pSkinningTech->SetWorldMatrix(m_pipeline.GetWorldTrans());


                  m_mesh.Render();


                  m_prevTransforms = Transforms;

      }
This is our render pass. It is almost identical to the one from the Skeletal Animation tutorial with changes marked in bold face. The intermediate buffer is a simple class that combines the color, depth, and motion vector buffers under a single frame buffer object. We've seen this already when we studied deferred rendering (tutorials 35-37) so I'm not going to review it here. Check the attached sources. The basic idea is to render into a FBO and not directly to the screen. In the motion blur pass we will read from the intermediate buffer.
Other than that you can see that we've added a class member to the 'Tutorial41' class that keeps the vector of bone transformations from the previous frame. We feed it into the skinning technique along with the current bone transformations. We will see how this is used when we review the GLSL code of the technique.
(tutorial41.cpp:209)
      void MotionBlurPass()

      {

                  m_intermediateBuffer.BindForReading();


                  glClear(GL_COLOR_BUFFER_BIT|GL_DEPTH_BUFFER_BIT);


                  m_pMotionBlurTech->Enable();


                  m_quad.Render();

      }
In the motion blur pass we bind the intermediate buffer for reading (which means that the rendering output goes to the screen) and render a full screen quad. Each screen pixel will be processed once and the effect of motion blur will be calculated.
(skinning.vs)
      #version 330


      layout (location = 0) in vec3 Position;

      layout (location = 1) in vec2 TexCoord;

      layout (location = 2) in vec3 Normal;

      layout (location = 3) in ivec4 BoneIDs;

      layout (location = 4) in vec4 Weights;


      out vec2 TexCoord0;

      out vec3 Normal0;

      out vec3 WorldPos0;

      out vec4 ClipSpacePos0;

          out vec4 PrevClipSpacePos0;


      const int MAX_BONES = 200;


      uniform mat4 gWVP;

      uniform mat4 gWorld;

      uniform mat4 gBones[MAX_BONES];

      uniform mat4 gPrevBones[MAX_BONES];


      void main()

      {

               mat4 BoneTransform = gBones[BoneIDs[0]] * Weights[0];

               BoneTransform     += gBones[BoneIDs[1]] * Weights[1];

               BoneTransform     += gBones[BoneIDs[2]] * Weights[2];

               BoneTransform     += gBones[BoneIDs[3]] * Weights[3];


               vec4 PosL         = BoneTransform * vec4(Position, 1.0);

               vec4 ClipSpacePos = gWVP * PosL;

               gl_Position       = ClipSpacePos;

               TexCoord0         = TexCoord;

               vec4 NormalL      = BoneTransform * vec4(Normal, 0.0);

               Normal0           = (gWorld * NormalL).xyz;

               WorldPos0         = (gWorld * PosL).xyz;


               mat4 PrevBoneTransform = gPrevBones[BoneIDs[0]] * Weights[0];

               PrevBoneTransform += gPrevBones[BoneIDs[1]] * Weights[1];

           PrevBoneTransform += gPrevBones[BoneIDs[2]] * Weights[2];

               PrevBoneTransform += gPrevBones[BoneIDs[3]] * Weights[3];


               ClipSpacePos0 = ClipSpacePos;

               vec4 PrevPosL = PrevBoneTransform * vec4(Position, 1.0);

               PrevClipSpacePos0 = gWVP * PrevPosL;

      }
Above we see the changes to the VS of the skinning technique. We've added a uniform array which contains the bone transformations from the previous frame and we use it to calculate the clip space position of the current vertex in the previous frame. This position, along with the clip space position of the current vertex in the current frame are forwarded to the FS.
(skinning.fs:123)
          layout (location = 0) out vec3 FragColor;

              layout (location = 1) out vec2 MotionVector;


          void main()

      {

              VSOutput In;

              In.TexCoord = TexCoord0;

              In.Normal   = normalize(Normal0);

              In.WorldPos = WorldPos0;


              vec4 TotalLight = CalcDirectionalLight(In);


              for (int i = 0 ; i < gNumPointLights ; i++) {

                      TotalLight += CalcPointLight(gPointLights[i], In);

              }


              for (int i = 0 ; i < gNumSpotLights ; i++) {

                      TotalLight += CalcSpotLight(gSpotLights[i], In);

              }


              vec4 Color = texture(gColorMap, TexCoord0) * TotalLight;

              FragColor = Color.xyz;

              vec3 NDCPos = (ClipSpacePos0 / ClipSpacePos0.w).xyz;

              vec3 PrevNDCPos = (PrevClipSpacePos0 / PrevClipSpacePos0.w).xyz;

              MotionVector = (NDCPos - PrevNDCPos).xy;

      }
The FS of the skinning technique has been updated to output two vectors into two separate buffers (the color and the motion vector buffers). The color is calculated as usual. To calculate the motion vector we project the clip space positions of the current and previous frame by doing perspective divide on both and substract one from the other.
Note that the motion vector is just a 2D vector. This is because it "lives" only on the screen. The corresponding motion buffer is created with the type GL_RG to match.
(motion_blur.vs)
            #version 330


      layout (location = 0) in vec3 Position;

      layout (location = 1) in vec2 TexCoord;


      out vec2 TexCoord0;


      void main()

      {

              gl_Position = vec4(Position, 1.0);

              TexCoord0   = TexCoord;

      }
This is the VS of the motion blur technique. We simply pass along the position and texture coordinate of each vertex of the full screen quad.
(motion_blur.fs)
          #version 330


      in vec2 TexCoord0;


      uniform sampler2D gColorTexture;

      uniform sampler2D gMotionTexture;


      out vec4 FragColor;


      void main()

      {

              vec2 MotionVector = texture(gMotionTexture, TexCoord0).xy / 2.0;


          vec4 Color = vec4(0.0);


              vec2 TexCoord = TexCoord0;


              Color += texture(gColorTexture, TexCoord) * 0.4;

              TexCoord -= MotionVector;

              Color += texture(gColorTexture, TexCoord) * 0.3;

              TexCoord -= MotionVector;

              Color += texture(gColorTexture, TexCoord) * 0.2;

              TexCoord -= MotionVector;

              Color += texture(gColorTexture, TexCoord) * 0.1;


              FragColor = Color;

      }
This is where all the motion blur fun takes place. We sample the motion vector of the current pixel and use it to sample four texels from the color buffer. The color of the current pixel is sampled using the original texture coordinates and we give it the highest weight (0.4). We then move the texture coordinate backward along the motion vector and sample three more color texels. We combine them together while giving smaller and smaller weights as we move along.
You can see that I divided the original motion vector by two. You will probably need some fine tuning here as well as with the weights to get the best result for your scene. Have fun.
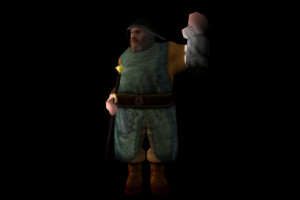
Here's an example of a possible output: